Live Streaming Dash Cams
Web Interface
Selecting Your Dash Cam
1: Once logged into your account, the first step to view your dash cam is to go to the Tracking tab and select your Dash Cam Device. Once your Dash Camera is selected, click the info button (i). This will bring up an information window with all the details on your DashCam device.
2: To view live streaming and historical video, click on the camera on the top right of your information window. This will bring up a the camera view for your DashCam.

Viewing Dash Cam Video
3: In this Camera View window, you'll have the option to select which cameras you'd like to view. You can select both, or just one, and sometimes even more if you have attached additional camera accessories. Click the down arrow to view all cameras attached to your Dash Camera.
4: To view live streaming video, click on the play button. Make sure Live is also selected. Once the play video is pressed, the streaming video should start playing within 10 seconds.
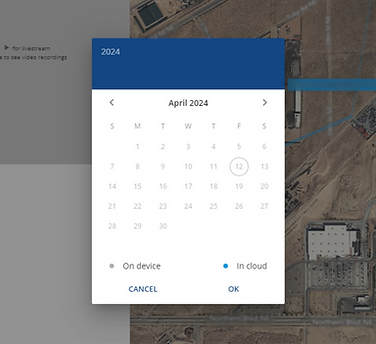
5: To view historical video from previously streaming sessions or from events (crash, hard braking, fast acceleration, hard turns, etc), click on the Calendar icon. Once the calendar icon is clicked, it will show a calendar display to view all of your saved videos both on the device itself or on the cloud.

Historical Videos
In the calendar window, you'll be able to see video saved on your device SIM card and video saved in the cloud. Dates with video available to view will be highlighted in the calendar.
6: By selecting blue bars, you'll be able to see video that has been uploaded to the cloud.
7: By selecting grey bars, you'll be able to view video from your dash camera SD card. It'll be uploaded to the cloud and viewable in the future without having to access your Dash Cam SD card.
8: When viewing your video, you'll also be able to see the historical GPS coordinates associated with that trip / video.

The calendar will allow you to select a day to view.
